Summer Forest 3D Paper Cut Light Box
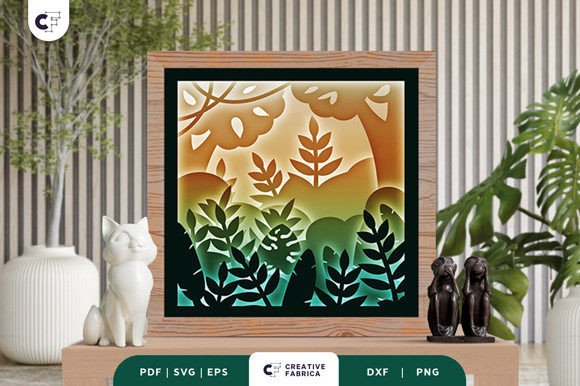
There is a unique magic in transforming flat paper into a vibrant, living scene. The Summer Forest 3D Paper Cut Light Box captures this essence perfectly, offering a way to bring the lush energy of nature indoors through the art of layering and illumination. This project is not just about following instructions; it is about creating a focal point that breathes life into any room. When light filters through the intricate layers of trees and bushes, the result is a shimmering effect that makes the decor appear alive, shifting subtly as shadows dance across the paper.
The Art of Layered Illumination
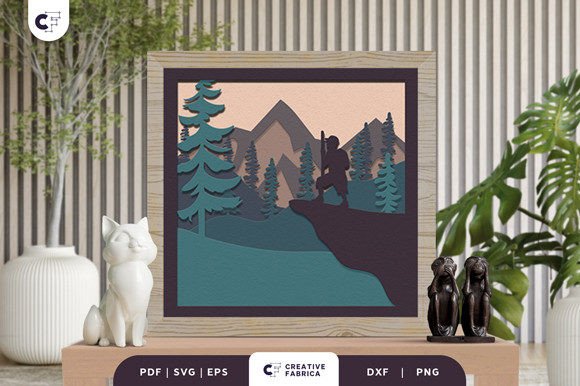
What sets this specific design apart is its ability to mimic the depth found in a real summer jungle. Unlike traditional flat wall art, a 3D shadow box relies on perspective and spacing to create volume. The bright light framework serves as the sun for your miniature world, enhancing the appeal of the lush trees and dense undergrowth. As you build the piece, each layer adds a new dimension, turning a simple cutout into a complex landscape where an adventurer might wander among the foliage.
This technique is particularly effective because it engages the viewer's eye in a way that static images cannot. The interplay between the glowing background and the silhouetted foreground creates a dynamic visual experience. It transforms a standard corner of a home or office into a serene escape, evoking the feeling of a warm, breezy day in the forest. For those who appreciate the intersection of craft and interior design, this light box offers a sophisticated yet accessible way to elevate their space.
Essential Materials and Specifications
To achieve professional results, the quality of your materials matters significantly. The design files provided for the Summer Forest 3D Paper Cut Light Box are versatile, available in SVG, PDF, EPS, PNG, and DXF formats. This ensures compatibility with most cutting machines, from Cricut and Silhouette to professional plotters. The project consists of six distinct layers, allowing for substantial depth without becoming overly complicated to assemble.
The physical dimensions of the finished piece are 20.32×20.32 cm (approximately 8x8 inches), making it an ideal size for desktops, shelves, or small wall mounts. For the best outcome, we recommend using high-quality cardstock. Specifically, Encore Cardstock 80 lb cover 216 gsm provides the perfect balance of stiffness and cutability. Thinner paper may warp under the heat of the light source, while thicker stock can be difficult to glue neatly. You can find this specific cardstock at our 12×12 Cardstock Shop. This link supports our content at no extra cost to you.
Step-by-Step Assembly Guide
Creating your own shadow box is a rewarding process that requires patience and precision. Here is a practical approach to assembling your Summer Forest scene:
- Cut and Prepare Layers: Import your chosen file format into your cutting software. Ensure your blade settings are calibrated for the 216 gsm cardstock to avoid jagged edges. Cut all six layers carefully.
- Construct the Base Frame: Begin by assembling the outer frame. This structure holds everything together and houses the light source. Ensure the LED strip or bulb is securely placed behind the back panel before attaching the first paper layer.
- Apply the 3D Feature of Layering: This is the most critical step. Use foam tape or specialized spacers to separate each layer. The distance between the layers determines the perceived depth. Start with the furthest background elements and work your way forward to the foreground adventurer and trees.
- Glue with Precision: Apply adhesive only to the corners or designated tabs to prevent warping. Allow each layer to dry slightly before adding the next to maintain alignment.
- Final Assembly: Once all layers are stacked and secured, attach the front glass or acrylic pane to protect the paper cuts and diffuse the light evenly.
Creative Applications and Variations
While the original design depicts a vibrant summer jungle, the underlying concept opens doors to endless creative possibilities. Designers and hobbyists can adapt this template for various contexts. For instance, educators might use the layered technique to teach students about perspective, parallax, and botanical structures. By changing the color palette of the cardstock, the same silhouette files could represent a winter wonderland, a mystical twilight forest, or even a futuristic cyberpunk cityscape.
Small business owners and entrepreneurs can leverage this design for product displays or boutique decor. A custom-made version with a brand logo subtly integrated into the foliage can serve as a unique marketing tool. Bloggers and content creators often use these light boxes as aesthetic props for photography, adding depth and texture to their setups without requiring expensive lighting rigs.
Adapting for Different Audiences
The versatility of the Summer Forest 3D Paper Cut Light Box allows it to serve different audiences effectively. For the casual crafter, it offers a weekend project that yields impressive results with minimal prior experience. The clear layering system makes it forgiving for beginners who want to learn the basics of papercraft without getting bogged down in complex techniques.
For professional designers, the vector-based files allow for customization. You can tweak the shapes, add new elements like birds or flowers, or adjust the density of the foliage to suit a specific client's vision. Marketers can use the "adventurer" theme to tell stories about exploration and discovery, aligning the physical product with brand narratives focused on growth and journey.
Maintaining Quality and Consistency
To ensure your final product looks polished and professional, attention to detail is key. One common pitfall is inconsistent lighting. Since the images are for preview purposes only, remember that the actual final product color may slightly vary due to lighting sources and the paper color. Always test your light source before committing to the final assembly. Warm white LEDs tend to enhance the cozy, summery feel, while cool white might make the greens appear more stark.
Organization during the crafting process also contributes to the final quality. Keep your layers sorted numerically as you cut them. Dust and fingerprints can mar the clean lines of the paper cuts, so handle the pieces with care. If you plan to produce multiple units, consider creating a jig or template for gluing to ensure every box has identical spacing and alignment.
Bringing Nature Indoors
Ultimately, the Summer Forest 3D Paper Cut Light Box is more than just a craft project; it is a statement piece that brings the serenity of the outdoors into your daily environment. Whether you are looking to decorate a child's bedroom, enhance a home office, or create a unique gift, this design offers a blend of technical skill and artistic expression. By mastering the art of layering and understanding how light interacts with paper, you can create something truly special that captures the vibrant scenery of nature's beauty in a tangible, glowing form.